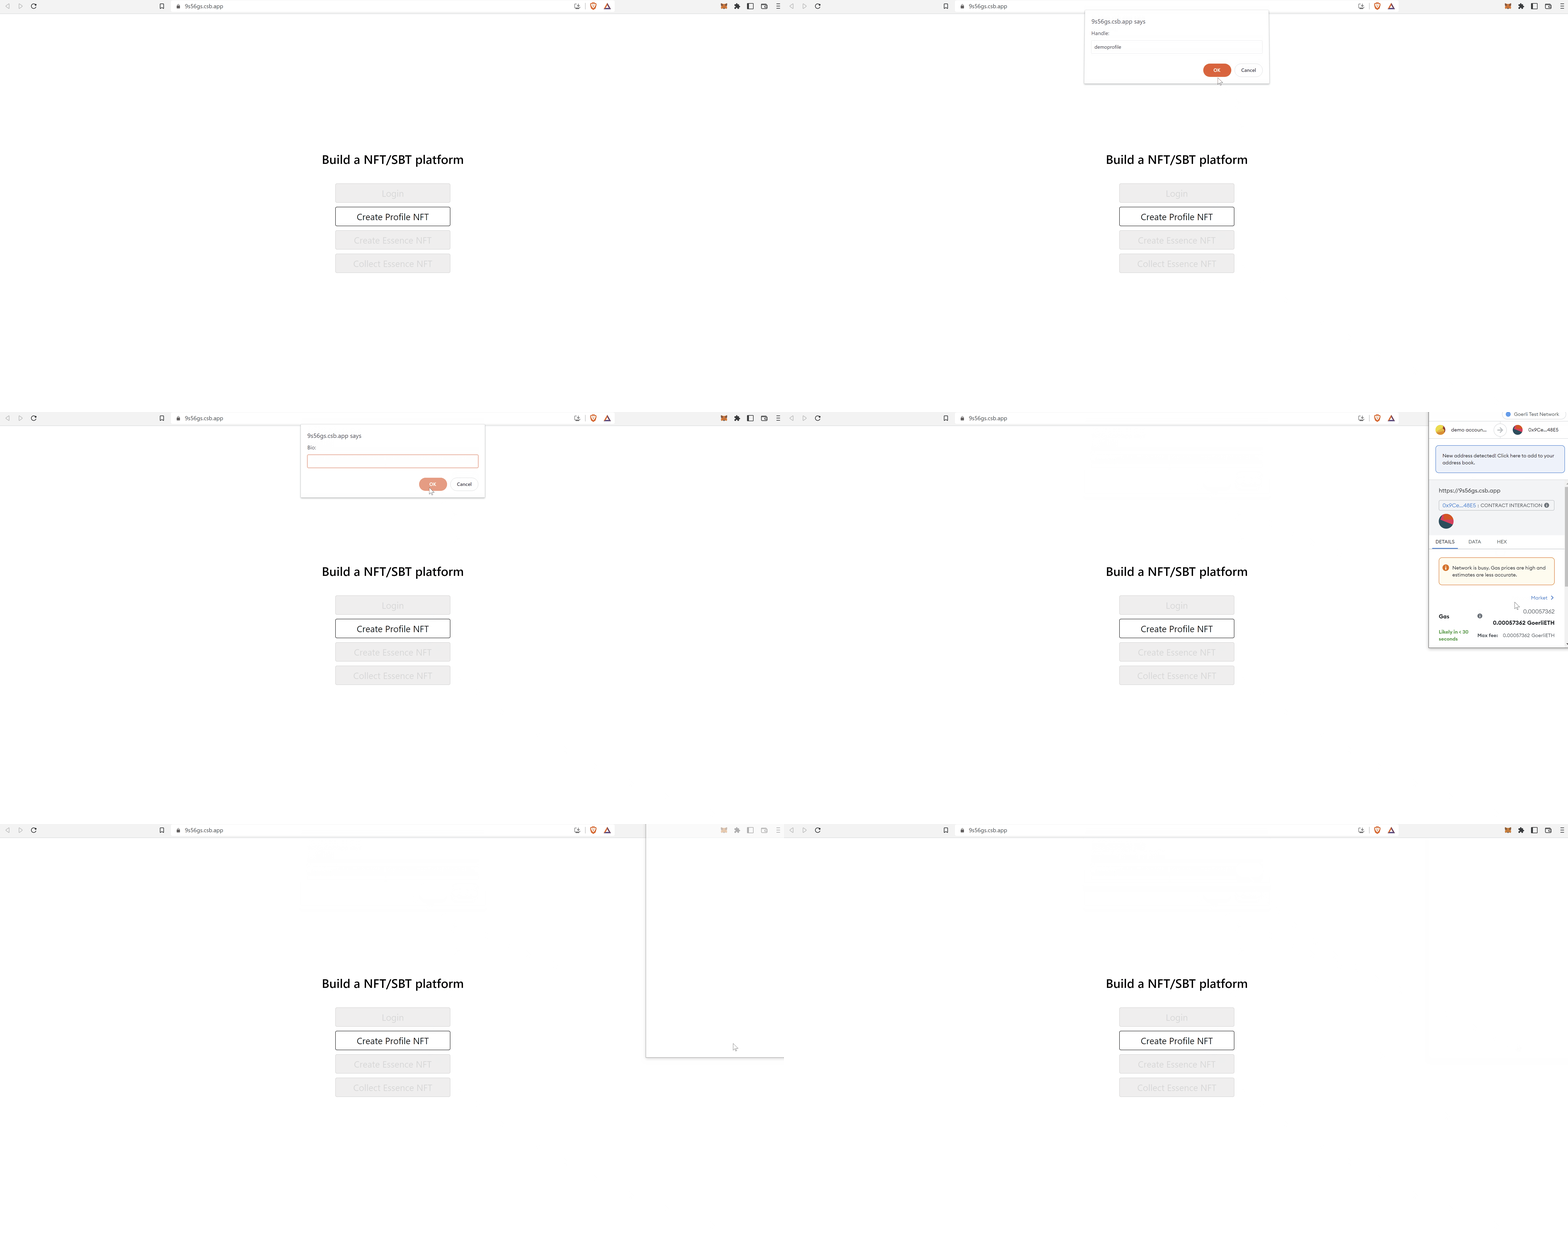
Create Profile NFT
To allow the user to create a profile, you'll need to implement a way to interact with the Profile NFT contract directly from the user's wallet. This can be achieved with the help of that particular Profile NFT contract's ABI.
You can check out an ABI's specification here if you're unfamiliar with it.
The reason why it's called Profile NFT contract is that, once a profile is created, a NFT will automatically be minted and transferred to the user's wallet.
Workflow

Profile NFT ABI
In this guide, you will be using CyberConnect's ABI for the Profile NFT contract 0x9CeA22A644B9172736dE345fE55b74c0908348E5. The ABI is simply a JSON file that needs to be imported into your project, and, the best part is that you only need to add the functions that you need.
info
The demo presented in this guide is using the CyberConnect Profile smart contract for the Goerli Testnet Network. Please refer to the Cheat sheet to find the full list of contract addresses for the CyberConnect Protocol.
Since you only need to create a profile and retrieve the profile id after the profile has been created, the ABI .json file contain both the createProfile and the getProfileIdByHandle functions:
[
    {
        inputs: [
            {
                components: [
                    { internalType: "address", name: "to", type: "address" },
                    { internalType: "string", name: "handle", type: "string" },
                    { internalType: "string", name: "avatar", type: "string" },
                    {
                        internalType: "string",
                        name: "metadata",
                        type: "string",
                    },
                    {
                        internalType: "address",
                        name: "operator",
                        type: "address",
                    },
                ],
                internalType: "struct DataTypes.CreateProfileParams",
                name: "params",
                type: "tuple",
            },
            { internalType: "bytes", name: "preData", type: "bytes" },
            { internalType: "bytes", name: "postData", type: "bytes" },
        ],
        name: "createProfile",
        outputs: [
            { internalType: "uint256", name: "tokenID", type: "uint256" },
        ],
        stateMutability: "payable",
        type: "function",
    },
    {
        inputs: [{ internalType: "string", name: "handle", type: "string" }],
        name: "getProfileIdByHandle",
        outputs: [{ internalType: "uint256", name: "", type: "uint256" }],
        stateMutability: "view",
        type: "function",
    },
];
info
Users can create as many profiles as they wish. There is also a setPrimaryProfile function in the Profile NFT's contract ABI that it can be implemented by following the same logic as the one described for createProfile.
Let's take a closer look at the required params that the function is expecting:
CreateProfileParams;preData;postData.
First, there are the CreateProfileParams that contain all the necessary information about a profile.
The first 3 key-value pairs for this param are pretty self-explanatory:
tois the user's wallet address;handleis the user's handle;avataris a URL link for the user's avatar.
Then, there is metadata, and here is where the Profile NFT starts to shine because it allows you to get creative. It all depends on how your app will look and the information it will display.
tip
Because metadata doesn't follow a specific schema, this allows developers to customize its structure as much as they want.
This is how metadata looks like in our example:
interface IMetadata {
    name: string;
    bio: string;
    handle: string;
    version: string;
}
Last but not least, there is operator which is telling the contract what address is allowed to make changes on behalf of the user's wallet address.
The next required params are preData and postData which are essentially middlewares that will dictate what the contract should process before and after a profile is created.
To keep things simple, you won't set any middleware in this example. More on this topic in the Middleware section.
Create Profile
Now it's time to create the CreateProfileNFTBtn component that the user can click on and connect with its wallet. After clicking, the handleOnClick function will trigger the MetaMask wallet to prompt, collect the user's input, perform a couple of checks, and call the createProfile function as intended:
import { ethers } from "ethers";
import { Web3Provider } from "@ethersproject/providers";
import ProfileNFTABI from "../abi/ProfileNFT.json";

const DEMO_CHAIN_ID = 5; // Goerli Test Network
const DEMO_PROFILE_NFT_CONTRACT = "0x9CeA22A644B9172736dE345fE55b74c0908348E5";
const DEMO_OPERATOR_PROFILE_NFT = "0x0000000000000000000000000000000000000000";

interface IMetadata {
    name: string;
    bio: string;
    handle: string;
    version: string;
}

function CreateProfileNFTBtn({
    provider,
    setProfileID,
    setHandle,
    disabled,
}: {
    provider: Web3Provider | null,
    setProfileID: (profileID: number) => void,
    setHandle: (handle: string) => void,
    disabled: boolean,
}) {
    const handleOnClick = async () => {
        try {
            // Check for the provider
            if (!provider) {
                throw Error("No provier detected.");
            }

            // Check for the chain id
            const network = await provider.getNetwork();
            const chainId = network.chainId;

            if (chainId !== DEMO_CHAIN_ID) {
                throw Error("Wrong chain.");
            }

            // Connect with MetaMask wallet
            await provider.send("eth_requestAccounts", []);
            const signer = provider.getSigner();
            const address = await signer.getAddress();

            // Collect user's input
            const handle = prompt("Handle:") || "";
            const avatar =
                prompt("Avatar URL:") ||
                "https://gateway.pinata.cloud/ipfs/QmNcqSpCvhiyHocUaVf7qB8qwEGerSpnELeAi567YEraYm";
            const name = prompt("Name:") || "Demo name";
            const bio = prompt("Bio:") || "Demo bio";

            // Check for handle
            if (!handle) {
                throw Error("No input handle.");
            }

            // Construct metadata schema
            const metadata: IMetadata = {
                name: name,
                bio: bio,
                handle: handle,
                version: "1.0.0",
            };

            // Construct metadata as string
            const metadataStr = `data:application/json;base64,${Buffer.from(
                JSON.stringify(metadata),
                "binary"
            ).toString("base64")}`;

            // Call the createProfile function
            const contract = new ethers.Contract(
                DEMO_PROFILE_NFT_CONTRACT,
                ProfileNFTABI,
                signer
            );

            const tx = await contract.createProfile(
                // CreateProfileParams
                {
                    to: address,
                    handle: handle,
                    avatar: avatar,
                    metadata: metadataStr,
                    operator: DEMO_OPERATOR_PROFILE_NFT,
                },
                // preData
                0x0,
                // postData
                0x0
            );
            await tx.wait();
            console.log("~~ Tx hash ~~");
            console.log(tx.hash);

            // Call the getProfileIdByHandle function
            const profileID = await contract.getProfileIdByHandle(handle);

            console.log("~~ Profile ID ~~");
            console.log(Number(profileID));

            // Update the state for profileID and handle
            setProfileID(Number(profileID));
            setHandle(handle);

            alert(`Successfully created the profile!`);
        } catch (error) {
            alert(error);
            console.error(error);
        }
    };

    return (
        <button onClick={handleOnClick} disabled={disabled}>
            Create Profile NFT
        </button>
    );
}

export default CreateProfileNFTBtn;
Nice work! You've officially implemented the functionality to create a profile! In the next section you will learn how to Create an Essence NFT.